Lotus Europa S1: Chassis Repairs, Part 1
Firstly I would like to point out my new domain name: http://www.sleurs-motorsport.com . If you had one of the other URLs favorited somewhere, please make sure that you change this, because all of the .co.cc URLs have stopped working. I know a lot of you are visiting this website through Jerry’s website (Lotus Europa), so I have asked him to change the URL in the registry as well.
Because of all the host trouble I had to mess around with all my settings in wordpress when I saw that I only updated this blog three times in 2012. This has a couple of reasons, the first one being that I’m at university during the week and I can only allocate a couple of hours each weekend to work on the Europa. And the second reason is that I had to plan the build a bit and I had to learn how to weld to repair the chassis. But now we’re back on schedule and I have decided to update this more frequently, the downside is that the updates won’t be so lengthy.
So I have started with the chassis repairs, work is going slow, but I’d rather do it slow and correct than have to clean up after myself a couple of years from now. The first job that I’m tackling is the rear Y-section of the chassis. This update will show you how I repaired the sheet metal around the radius arm mounts. I have started work on some other parts of the Y-section, but I’ll show you this when I’ve finished those individual pieces.
The problem with the radius arm mounts is that the area round the rearmost bolt hole has a lot of cracks around it. I think this has to do with hitting curbs or being in accidents. These cracks would appear if the rear wheel was pushed inward towards the center-line of the car.

This is the left side of the chassis. Here you can see the damage that I’m speaking of.

On the other side, the damage is much bigger. Here the cracks have progressed a lot further and the metal around the bolt hole has sheared off. When I took the car apart, the radius arm bush, that is secured by bolts through those holes, was held in place by a bolt through a piece of scrap metal on the backside of the chassis.
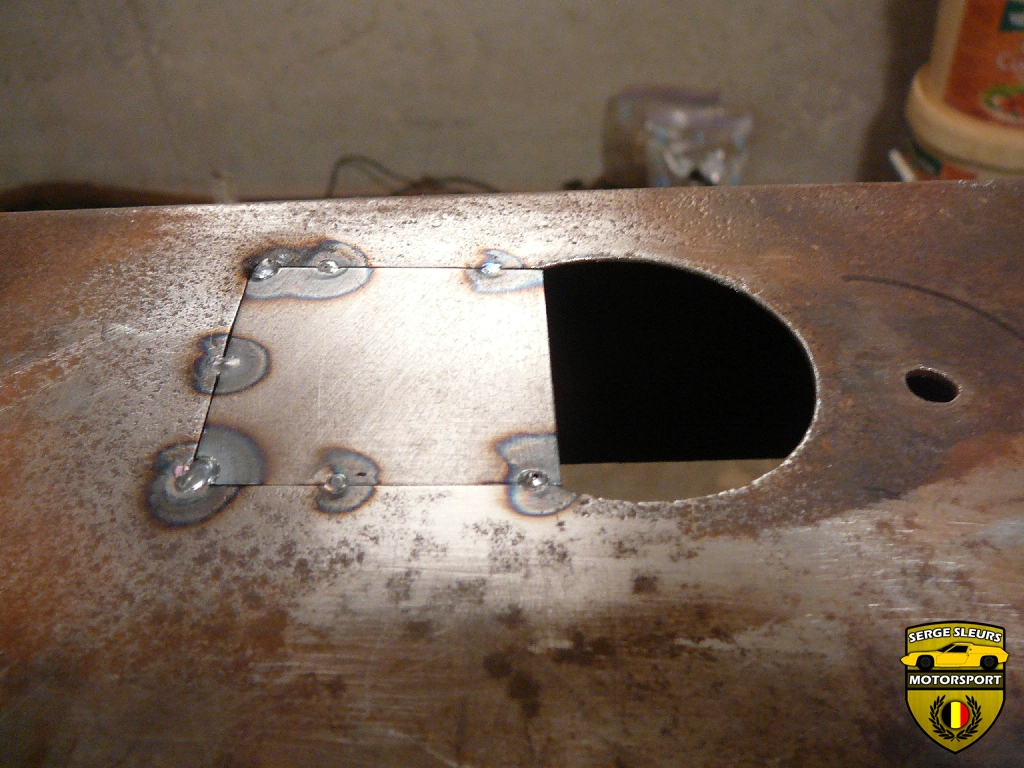
The first thing I did, was to cut a square of sheet metal 16 gauge thick (as is the original chassis) that would be sufficient to replace the biggest part of the damaged area. Then I positioned this square piece and drew around it.

I used these markings to cut out the damaged area and filed the hole to fit the piece of sheet metal.

The magnets I used to hold this plate in place where just some fridge-magnets I found in our house, because the bigger ones that I would normally use where at my dads company and I wasn’t in the mood to go there and look for them, so these had to do.

So with the plate tacked into position I could remove the magnets and check the fitment once again. If I needed to make adjustments, this was the last time to do so. Luckily everything was spot on.

Now I welded up all of the seams. The welds don’t look as perfect as they could, but I had to make another pass on one of the welds, to make sure that the penetration was good enough.

Next thing I did was grounding off all of the excess weld and then I used one of the original radius arm mounts, to find out where the new bolt hole had to be. I bolted the mount down with the remaining bolt hole and then I made a mark where I needed to drill. Fortunately it worked out perfectly! I used my new imperial sized step-drill that I got off of E-bay for around 10 euros. This was a lot cheaper than having to buy a complete set of imperial sized drills and I still have all of the drill sizes that I would need to do these chassis repairs.

Of course I needed to grind off the excess on the rear as well. I’m going to reinforce these parts of the chassis with a strengthening plate so that the bolt holes won’t crack again.
This is all for this update, but I promise to give you another update very soon. I think I need another one or two weekends on the rear Y-section and then I can move on to the backbone part itself.
Thank you for reading, I hope you enjoyed it. Please share it with all your friends!
Serge