Lotus Europa S1: Chassis Repairs, part 2
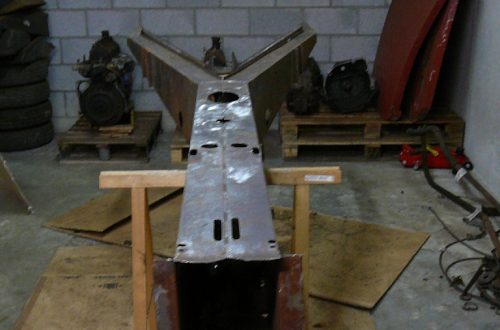
In this post I’ll show you the ongoing repairs to the rear Y-section of the chassis. I have been working on the repair and improvement of the strengthening plates for the engine mounts.

This is the strengthening plate for the engine mounts. These are spotwelded to the chassis and reinforce the part of the chassis that the engine mounts bolt on.

The problem with this is that because the plates aren’t seam welded around the edged, a lot of water and moisture can seep between the two plates and it creates a lot of rust between the plates. It isn’t a big problem, but it will create more problems in the future if nothing is done to it.

So I drilled out all of the spot welds. But because I couldn’t find spot weld drill in any of the local shops, I had to use a regular 10mm drill bit, this works, but because these drills are very point (in stead of being obtuse, like a spot weld drill) I created some pitting in the chassis where I drilled to deep into the spot weld.

Now the plate has come off the chassis, you can see the amount of rust that was hiding between the two plates.

Once all the rust has been removed with a wire-wheel, you can see that the chassis itself is still very sound.

I filled in all the little pits with my TIG welder and ground it flat.

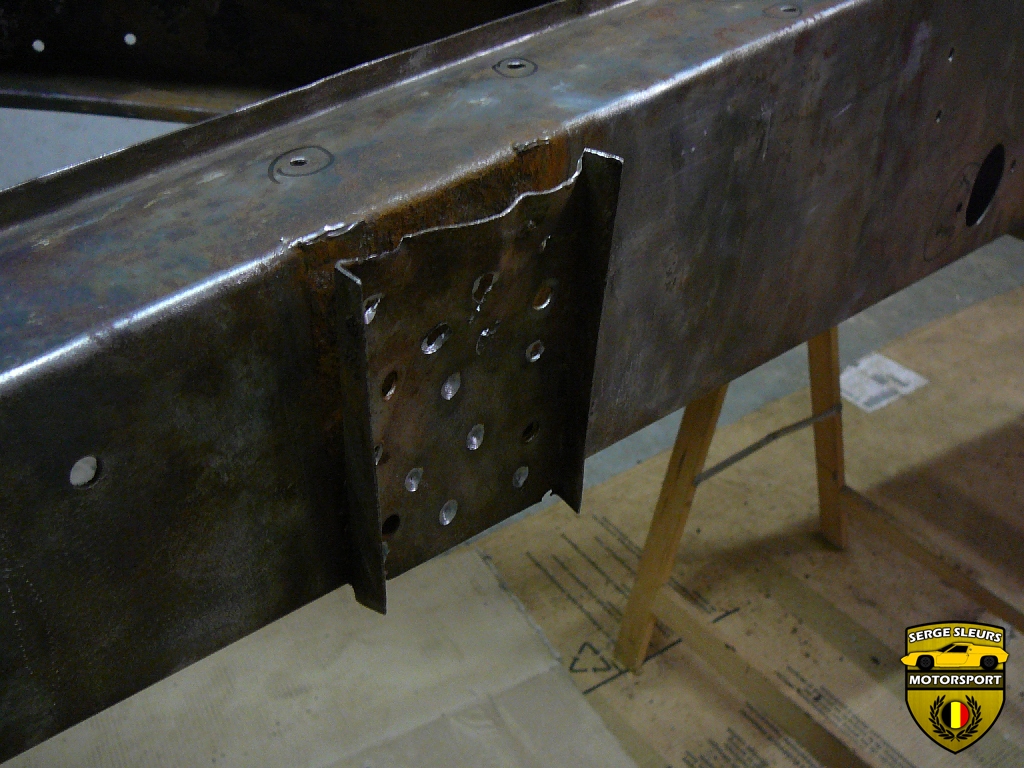
To replate the plates that I took off, I remade my own plates from 16 gauge steel sheet metal using the original pieces to take the measurements from. I made the bends by placing the plate in a big bench vice and hitting the edges flat with a hammer.

I drilled all of the holes one at the time and I bolted the plates onto the chassis to make sure they fit.

Next, I used a zinc primer to paint the sides of plates that would be facing each other after they were welded together. This paint is used on the sides that aren’t accessible once it’s welded. The other big advantage of zinc spray, is that it’s weldable, however it’s difficult with TIG, because of the sooth that’s created once you strike an arc. Because this is weldable, the paint has a high temperature tolerance, so it will only burn off on the weld itself, so I if I seam weld around the edges, the paint on the metal right next to the weld will still be protected from the elements.

The painted surfaces, together with the plates seam welded, will hopefully ensure that the rust between the plates won’t return in the next decades.

The same paint process was done to the back of the strengthening plates themselves.

Now I bolted the strengthening plates back onto the chassis to hold them in place while welding.

I found this a very difficult joint to weld, because this is an inside corner joint, but one of the plates folds away right at the joint. It took me a whole afternoon to master this, but in the end it came out quite good.

Although the welds look quite aesthetically pleasing, I decided to grind them off so the plate sits flush with the chassis.

Once finished I was quite pleased with the look of the plates, and now they’re built to last!

This is another small job I had to do on the rear Y-section. Both the factory and previous owners had drilled a lot of holes in the rear Y-section, some for grounding the electrical system and some for clamps for piping and wiring. So I decided to fill in these holes and drill the ones I needed again in the future, but in the places I actually wanted them.

So I filled in the holes with my TIG welder and then I ground them flat so you would never know they were there.
This was it for this small update! Because my exams are coming up I’ll have little time in the next two months to work on the Lotus, but I’ll try to slip in a couple of hours now and then. I think I need another couple of hours on the rear Y-section before the metalwork is finished. Then I’ll paint it and move on to the backbone part of the chassis.
I hope you enjoyed the update! Please share it with your friends!
Serge