Lotus Europa S1: Finishing off the chassis
The last big job on the chassis was welding the T-section back onto the backbone. This is how I did it.

I started off by using my floor as a jig, to make sure the chassis and the T-section are located in the same horizontal plane.

Then I tilted the T-section back, so that the panel would line up with the angled front of the backbone. I double checked that it was 3° on either side of the backbone before I tacked the T-section to the backbone.

I used a level to check the alignment.

Then I measured the distance between the left front and rear suspension pickup points as well as the same on the right, so that the T-section was square on the backbone.


The coolant pipes go from the rear of the backbone (near the engine) through the rear bulkhead towards the front of the car through the front T-section. So I had to make sure that both coolant pipes could pass through the holes in the chassis. They all lined up perfectly so no worries there.

After I tacked the T-section on, I put it back on the stands to make welding a lot easier.
no images were found
The top of the backbone has a V-shaped lip that you need to weld onto the T-section, so that is were I started.

I was planning to add some strengthening plates to the joints. But after I welded everything up I decided not to use these, because I really like the clean look of the weld bead and I don’t think it is necessary.

This is what the weld looked like. I did a double pass to get some extra meat into the weld.


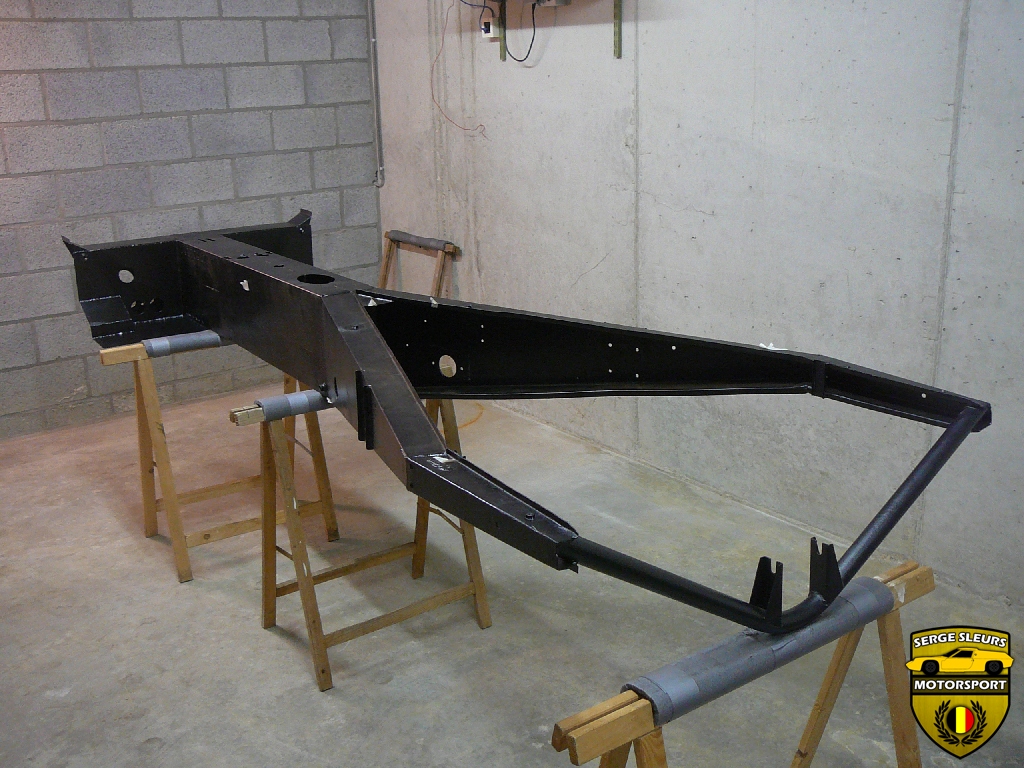
The chassis was put back onto the ground to mock up the bottom floor plate and the little boxes that will encapsulate the front suspension pickup points.


I started off by welding the bottom plate onto the chassis, without tacking the boxes on, because this would have impeded the access when welding.

You might also notice that I removed the mild steel M6 nuts that I previously welded onto the backbone (to get a good ground for the electrical system). They had already started rusting on the threads (the zinc plating had burned off by welding them on) so I replaced them with stainless steel M6 nuts. Problem solved!

Then I welded the boxes on. They will separate the wheel well from the interior foot well of the car (they are also covered in fiberglass on the inside).

All of the rust was cleaned of with a wirewheel on an anglegrinder so I could get round to painting the chassis.

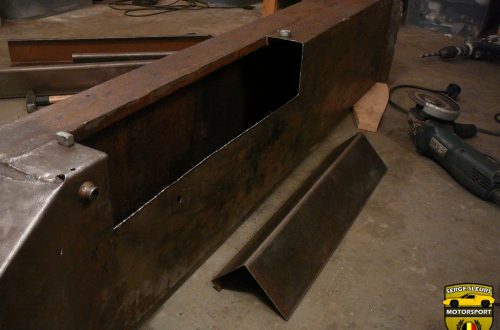
One thing that I wanted to do to my own T-section, after seeing the effects of nature (rust!) on the original T-section, was sealing the open end of the spot welded plates of the front T-section. Because they are only spot welded, moisture can seep in between the plates and can create havoc. It is not really possible to use any seam sealer on those locations, but I was able to run a very small weld bead on the ends of the plates, and thereby sealing it forever.

You might remember that I still needed to weld on a bottom for the front T-section. I waited this long so I could get access to the inside of the front T-section, as well as to the front of the inside of the backbone. I could not paint the inside of these pieces until all of the welding had finished. So I painted the insides first.

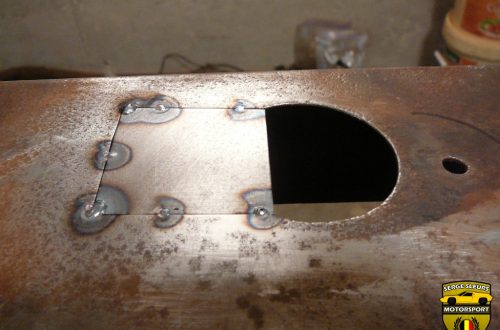
I tacked on the plate that I had cut to size before.


I seam welded the plate on before I ground off all of the weld beads.

I also drilled two 32mm holes in the rear bulkhead to feed the oil cooler hose from the front to the engine.


These are the final pictures, I painted the inside of the bottom plate on the T-section through the front access hole and I painted the front T-section on the outside. I used black epoxymastic paint on all of the surfaces.
This is the end of this post, a short video on this subject will be online in the near future. If you have any questions or comments don’t hesitate to contact me.
Enjoy & Share!
Serge