Lotus Europa S1: Refurbishing driveshafts
Hi everyone,
In this post I’ll show you how I restored the rear driveshafts of my 1967 Lotus Europa S1, including the modifications that I made to them.

Here is how the driveshaft looks after being removed from the car. It is completely covered in dirt and roadgrime.

The U-joints were fairly rusted and difficult to remove.

When removing one of them, I made the mistake not to pay attention and I cracked the driveshaft!

The correct method of removing these, Is using a press or vice to push the U-joints out of the driveshafts.

I then used sume vice-grips to remove the bearing caps completely.

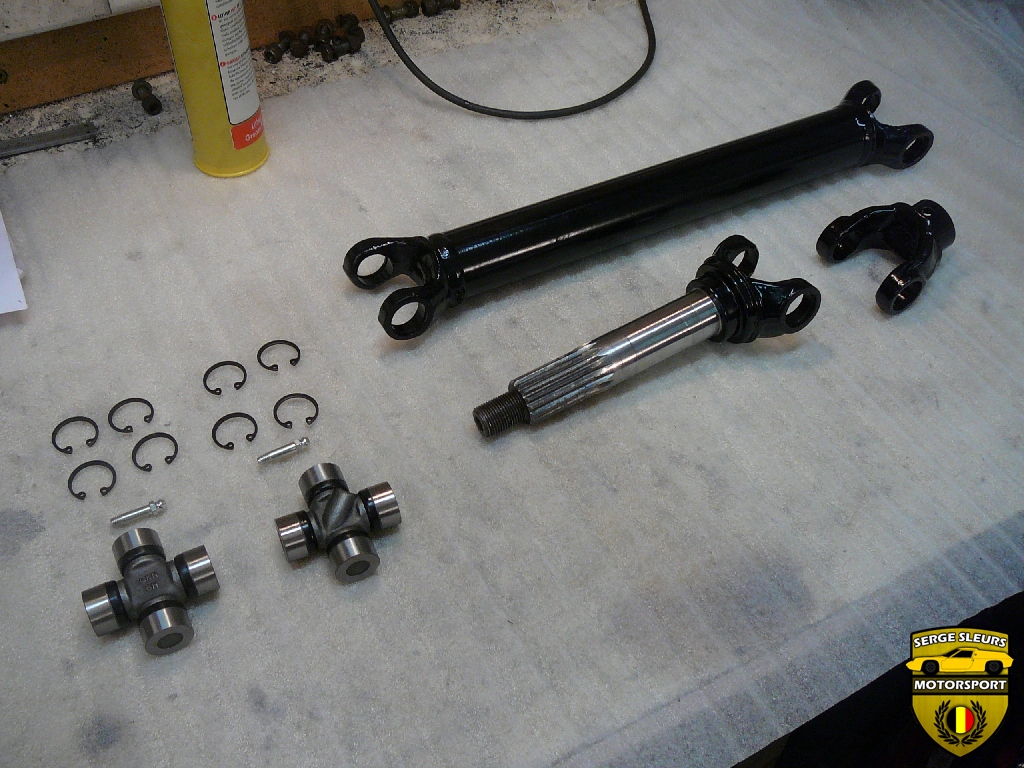
This is what everything looked like once disassembled (including the broken driveshaft on the bottom).

The stub-axles that I removed were in pretty good condition. One was a little beaten up, but I could have used it without a problem.

I managed to find another used driveshaft that I could use to replace the one that I broke.

Once I cleaned everything, they looked remarkably good!

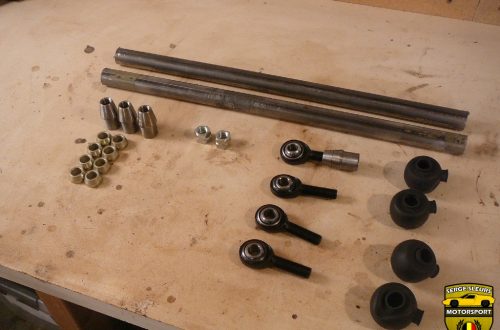
The inner parts of the driveshaft and the stub axles needed some work to clean them up. I had bought 3 extra stub axles online, so I cleaned them all up and picked the best two to use.

After cleaning everything up, I painted them in zinc-spray.

And then I used automotive grade two-pack primer, which I sanded smooth after 3 coats.

Then I used semi-gloss black two-pack automotive paint in my make-shift spray booth.

All parts came out quite nice, even if I say so myself.

I used high quality GKN U-joints, with new spring clips and grease nipples to put everything back together.

Apart from painting the parts, I also polished the stub axles with some metal-polish.

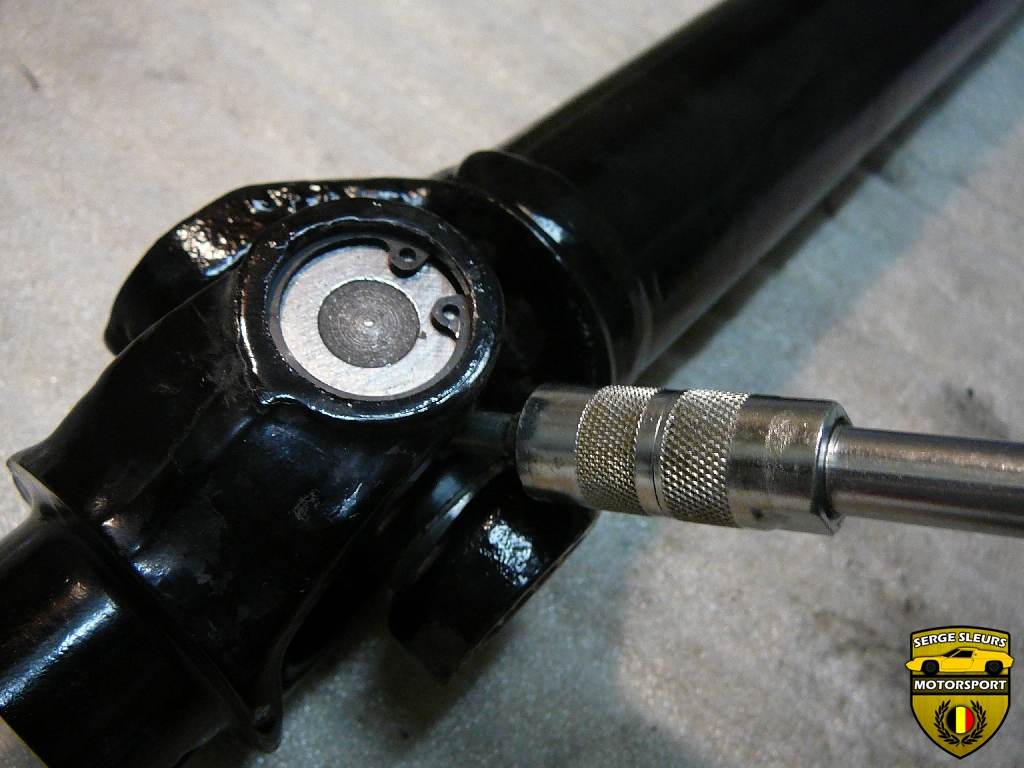
The inner surface of the stub-axle, where the inner wheel bearing will sit, Has an original outer diameter of 31mm (opposed to the outer race of 30mm), this to help with the installation of the inner wheel bearing.

The later Twin Cam Europa’s all had 30mm wheel bearings. I had my stub-axles turned down to 30mm. The reason for this, is that the inner wheel bearings are specialised parts and are very expensive. It’s easy to see the difference between the modified and original stub-axle.

One small, cheap modification to the stub-axles means that I can use off-the-shelf bearings that are readily available and inexpensive. The installation of the smaller bearing is not any more difficult, but I’ll show you this in the next post. Again, modified vs original.

When installing the new U-joints, be careful not to lose any of the needle-rollers inside the caps.

I didn’t mask of the bearing surfaces of the driveshafts, so I needed to clean this up before installing the U-joints.

A small sanding-drum on a Dremel-tool made short work of this.

Again, installing one side at the time, pressing the caps into place using a vice.

Installing circlips.

And repeat for the other side of the U-joint.

Once installed, screw in the grease-nipple.

Pump in some lithium grease until it comes out of the rubber seals. This won’t take much, most of the new U-joints are pre-greased.

And that’s it! One completely assembled driveshaft!
If you would like to have a more detailed explanation of how this works, you can watch the video here. You can scroll through the image-gallery below.
Enjoy,
Serge