Lotus Europa S1: Bloody Knuckles and Broken Dreams, Part 1
I started disassembly a couple of weekends ago and I had some things to show for it. I had bloody knuckles from parts that didn’t want to come loose, and after the first day of stripping the car down, I knew this project was going to take a lot longer than I first anticipated. But there’s also some good news!

A couple of weeks ago I heard about some one who owned a car restoration garage and he had just moved his operation elsewhere and he was trying to sell some of the parts he collected over the years and he wasn’t going to use. He happened to have a lot of old Renault engines and gearboxes, including a R16TS engine (100bhp)!
But the one I was interested in, was the R16TL engine, type 821, the 1565cc wedge head version of the 807 cross-flow engine you would find in an Alpine A110. My Lotus Europa uses a Renault 697 engine, which is an 1470cc version of the 821 engine, it has a 81mm crankshaft in stead of the 84mm that is used in the 821. But the important thing is, that it has the same cylinder head and valve gear.

The engine came with a 336 R16TL gearbox, which is almost the same as the one in my Europa. There are two differences, one is that the differential is flipped over in order to be able to turn the engine around, and the Europa has a different final drive ratio.
Between the engine that’s still in the car at the moment, the one I bought and the extra parts that came with the car. I have one spare cylinder head, two virtually complete engines, except some ancillaries like the distributor.

After I carefully jacked up the car and got it on axle stands, the wheels came off, some more easily than others. I got the first look at the state of the suspension and brakes. The shocks are completely shot, as expected, and the disc brakes look OK, a pair of new discs and rebuilding the callipers would do the trick.

I haven’t started to take apart the rear suspension, but that’s the job I’m tackling next weekend.

Tail lights, head lamps and indicators came off first. Some S1’s didn’t have the reversing lights wired in apparently, that’s good news for me, because my car didn’t came with all the bulb holders. I might try to make a mould of the ones I do have, so I have working reversing lights. I’m also thinking of making moulds of the tail light lenses. I read that Omicron Engineering are able to get the lenses, but at ridiculous prices, so I might as well make a silicon mould to be able to reproduce the lenses if necessary.

Getting out the radiator was more work than anticipated, it didn’t help that the top bolt, holding the radiator in place was seized and trying to make it turn resulted in a round bolt head, so I ended up cutting the bolt off with my dremel.

I got the heater fan out of the front luggage compartment and took out the window washer bottle and pump. I will have to make new covers for the inspection holes, because they weren’t installed when I got the car.

Disassembling the front suspension looked to be an easy job, after I bought a ball joint puller. The right side came off really easily, but I still haven’t managed to get out the left side. All of the metal parts of the wishbone bushes are rusted to the pivot bolts. My next plan of attack, more penetrating oil, more heat and a bigger hammer. I’m not giving up!

Because the right side came off a little bit too easy, I started to look around and I found the reason it was loose. The car has been in an accident, there are multiple tell tell signs. The first one is the bent front right lower wishbone, it has a dent in it where it got hit by the anti-roll bar. The drop-link is bent a little bit.


The front has had a fair bit of fibreglass work, especially around the right headlight bucket, the bucket itself is also bent at the back. There’s also a metal reinforcing plate in the right front wheel well. I can’t see how bad it is until I get all the paint off, but everything is repairable.

This accident might also explain at least some of the previous paint work. You can see the bare fibreglass, the gel coat and some primers, the original yellow paint, a green paint, a dark red or purple, and then the current colour. I’m planning to use chemical strippers to get the paint off the car, so then we’ll know for sure what paint has been on there, and what repairs are hiding underneath.

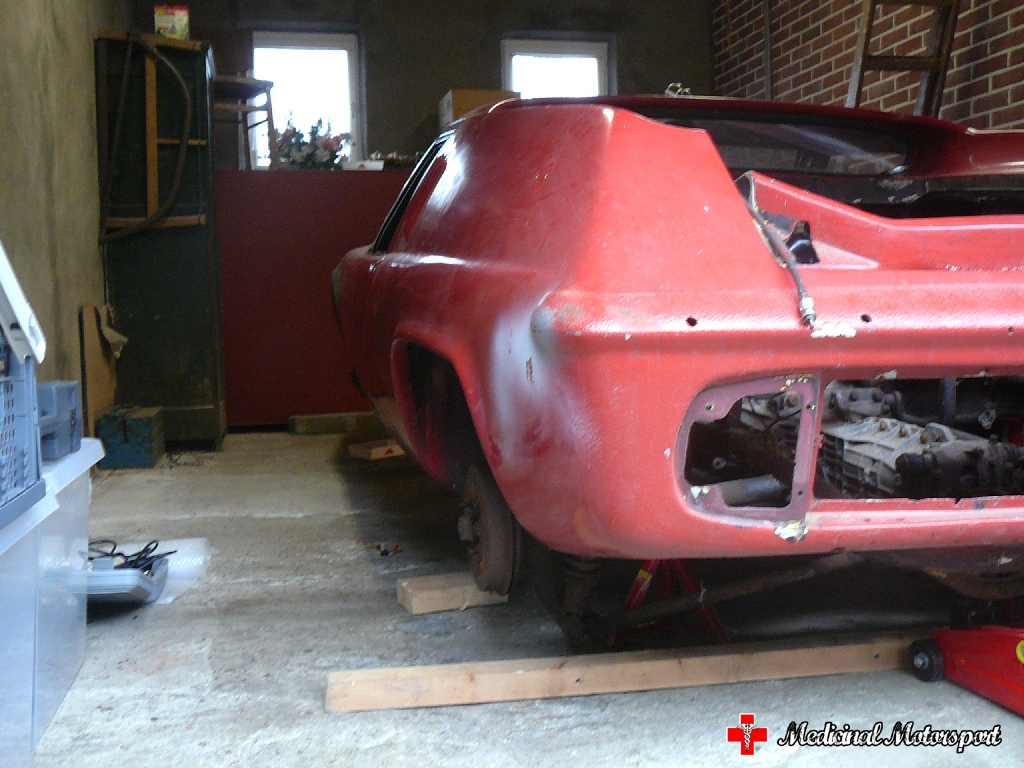
In this picture you can see the rear cross beam that has been welded up in the past, so that might need replacing. You can also spot the custom battery box on the right, courtesy of one of the previous owners. I also had to grind off a couple of exhaust brackets that where used to hang up the twin exhaust system in the past.

I removed the dash board, and found an electrical mess! The car has been rewired in the past, but by some one who didn’t know what he was doing. It might have worked, but I think there was more electrical tape in that harness than there was solder. I had to cut all of the wires out because I didn’t have a clue where to start. All the instruments look OK, but we’ll take a look at them later.

This is some of the wiring I cut out of the car.

Got everything out of the front boot. I’m in the process of removing the steering column and rack, I got the pinch-bolt out after some cursing, but I ran out of time to get everything separated. The bolts that were previously welded to the chassis to hold the steering rack in place came loose, so I’ll have to stick my hand in there to unbolt it.

Onto the chassis, it’s rusty. But I have the impression that it’s only surface rust!

There is no way to know for sure until I get the chassis out of the body, but I used my wire brush to removed some of the rust and tried poke a hole in the chassis, but it wouldn’t budge. I hope it’s still salvageable, it’s all right if I have to repair some parts, but it still has to have some rigidity, otherwise I might replace it with a brand new one.
I hope you enjoyed the read!
Serge